First, the procedure for installing Microsoft Visual C++ toolchain in Eclipse IDE
and Windows 10 is presented.
Then, a C++ 32-bit HelloWorld project is implemented.
Six paths must be included in the project
before the executation of this simple program.
We include these six paths for 64-bit C++ project into user environment variables
of Windows 10. As a result, the setup of a C++ 64-bit HelloWorld project becomes simpler.
Finally, C++ 64-bit shared library svdComplexDevice1.dll is generated with
Microsoft Visual C++ toochain in Eclipse IDE.
Visual Studio Community 2015 with update 3, x64 (Release date: 27/Jun/2016) is needed.
*** Outline ***
- The C/C++ Visual C++ support in Eclipse IDE
- The C++ 32-bit HelloWorld project with Microsoft Visual C++ toolchain in Eclipse IDE
- The User environment variables in Windows 10
- The C++ 64-bit HelloWorld project
with Microsoft Visual C++ toolchain in Eclipse IDE
- The C++ 64-bit shared library svdComplexDevice.dll project with Microsoft Visual C++ toolchain in Eclipse IDE
- Various references
C/C++ Visual C++ support in Eclipse IDE
Two ways to install MS Visual C/C++ support for Eclipse IDE in Windows 10 are available:
(1) If Eclipse IDE for Java developers is already installed, install C/C++ programs
from Eclipse IDE.
(2) If Eclipse IDE for C/C++ developers is already installed, install CDT
from Eclipse IDE.
(1) Eclipse IDE for Java Developers installation in Windows 10
- In
Eclipse IDE 2020-03, click Download 64 bit button,
then click Download button for obtaining eclipse-inst-win64.exe.
Click this executable results the choice panel:Select Eclipse IDE for Java Developers.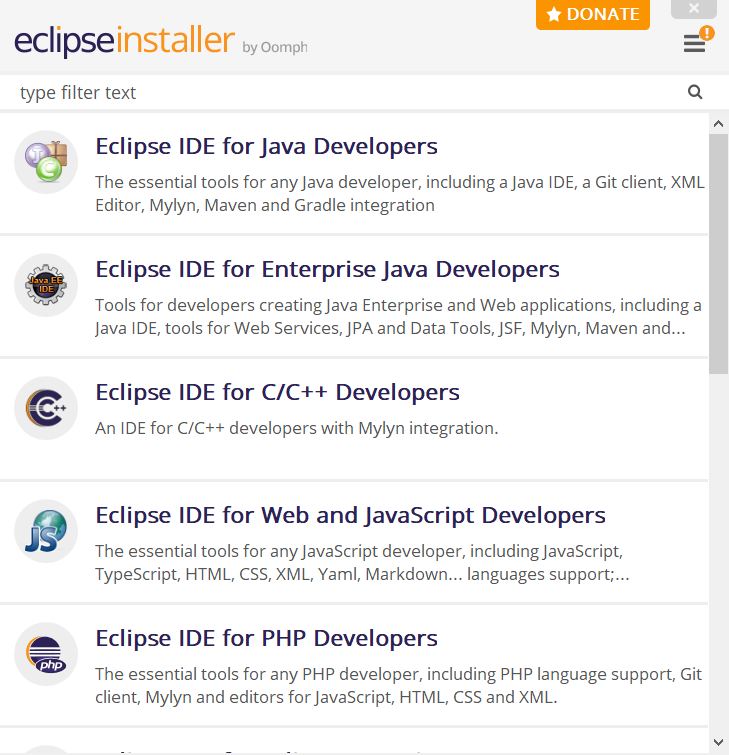
- Perform the installation of Eclipse IDE for Java Developers.
My Java application folder location is C:\Users\Papa\eclipse-workspace. - In Eclipse IDE, select Help menu then Install New Software...
Available Software panel appears.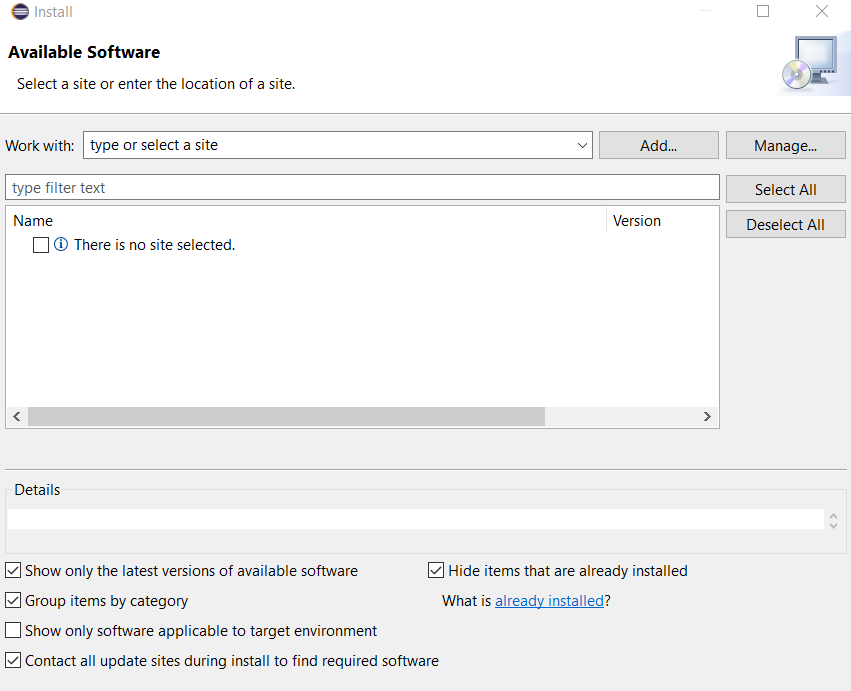
- In Work with, select All Available Sites.
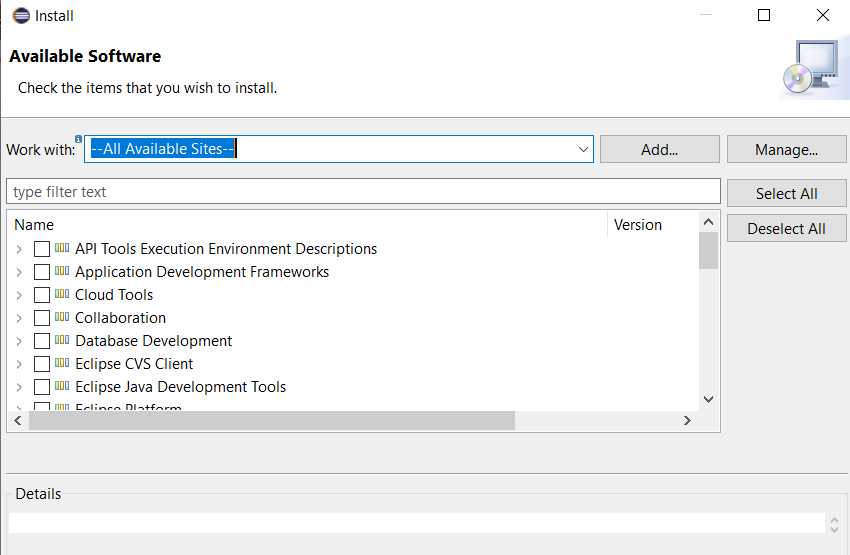
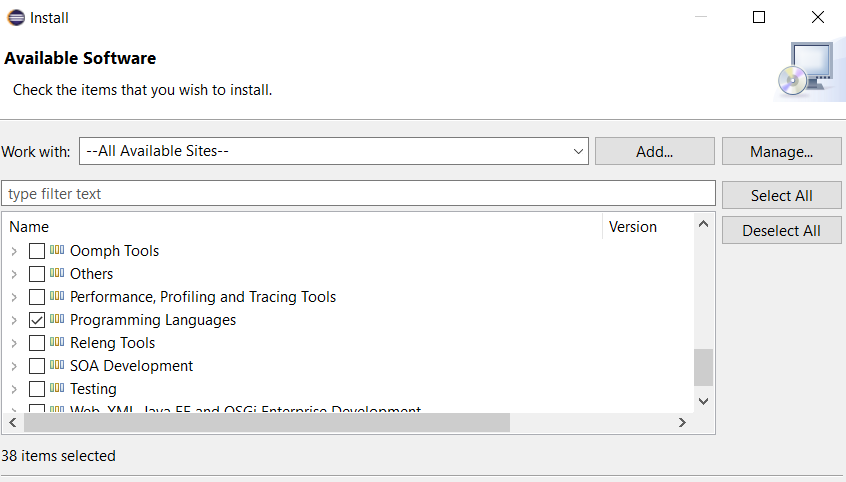
- Tick Programming Languages.
Click Next > button.
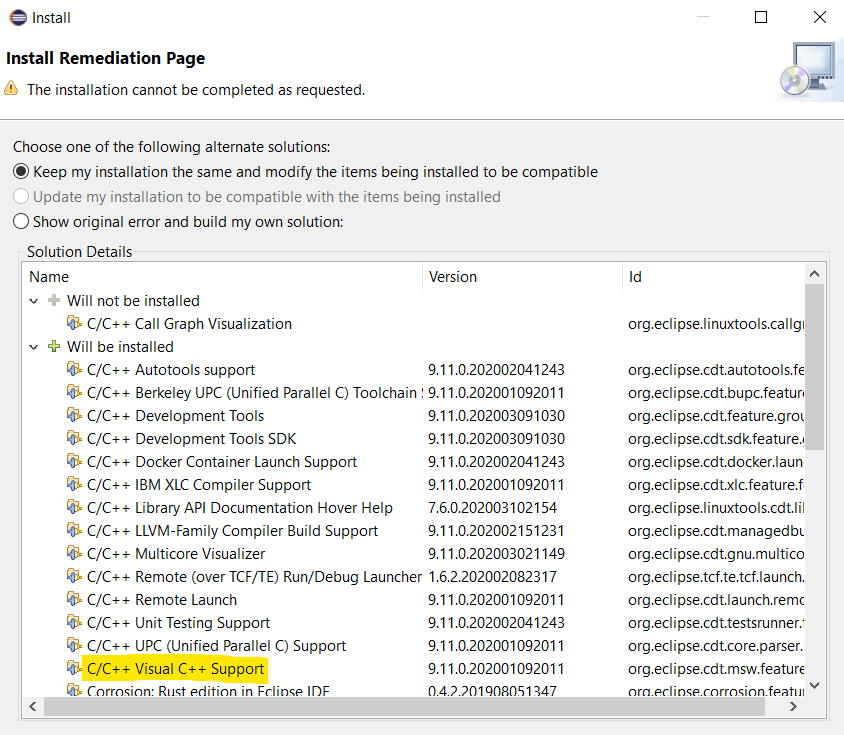
- Install Remediation Page panel appears.
Click Next > button.
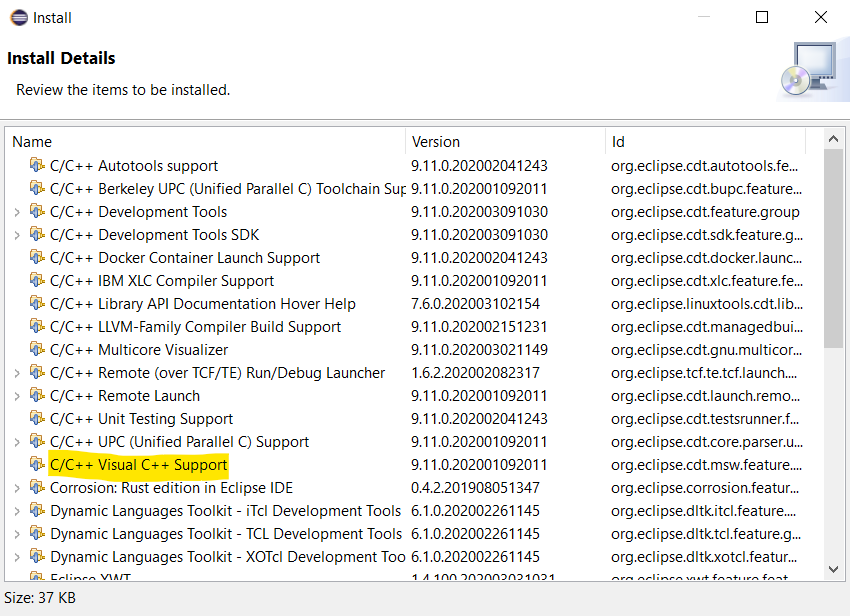
- Install Details panel appears.
Click Next > button.
- Review Licenses panel appears.
Tick the choice: I accept the terms of the license agreement.
Click Finish button. - In Eclipse IDE.
Select Help menu then About Eclipse IDE.
- Click Installation Details button.
C/C++ Visual C++ Support is available.
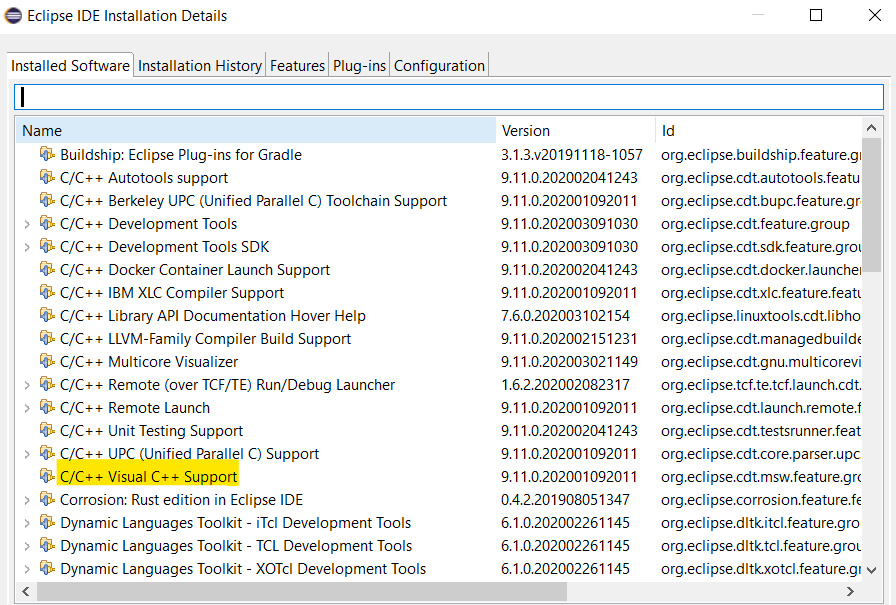
Click Close button.
(2) Eclipse IDE for C/C++ Developers installation in Windows 10
- In
Eclipse IDE 2020-03, click Download 64 bit button,
then click Download button for obtaining eclipse-inst-win64.exe.
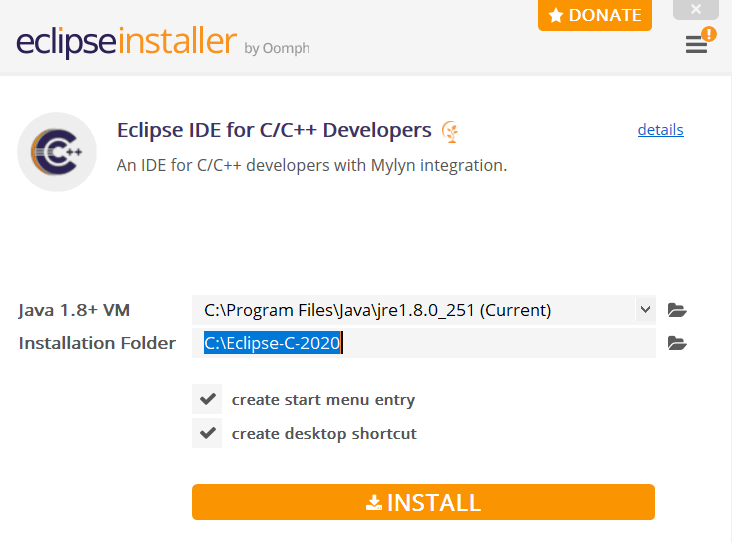
Click this executable results the choice panel: - Select Eclipse IDE for C/C++ Developers.
Click folder icon for creating a new Installation Folder.
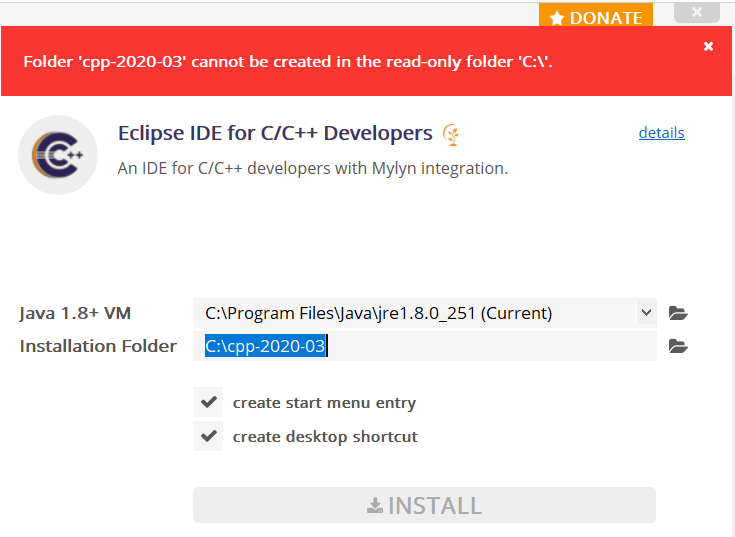
- Provide a folder for Installation Folder.
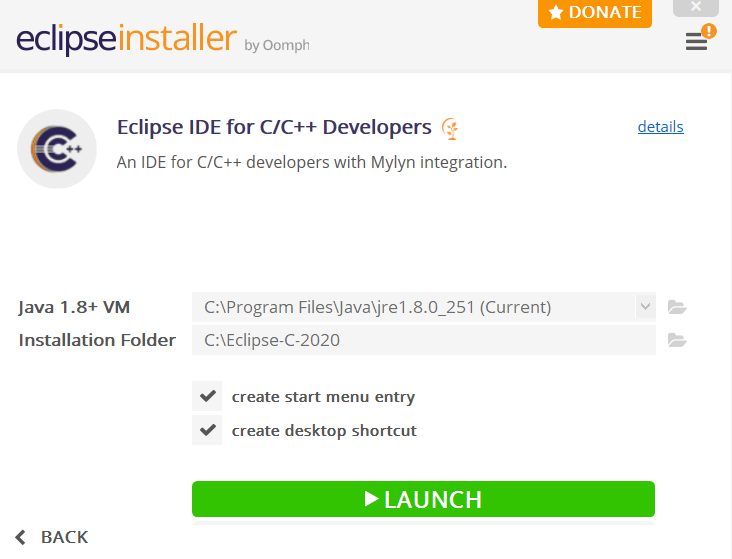
Click INSTALL button.
- Click LAUNCH button.
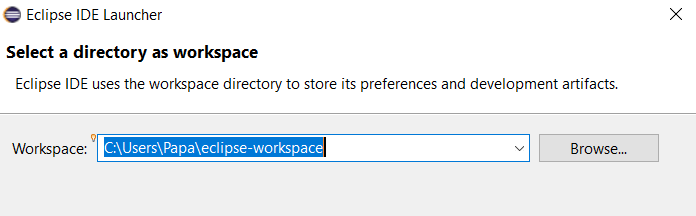
- Provide a workspace.
Click Launch button.
- In Eclipse IDE, select Help menu then Install New Software...
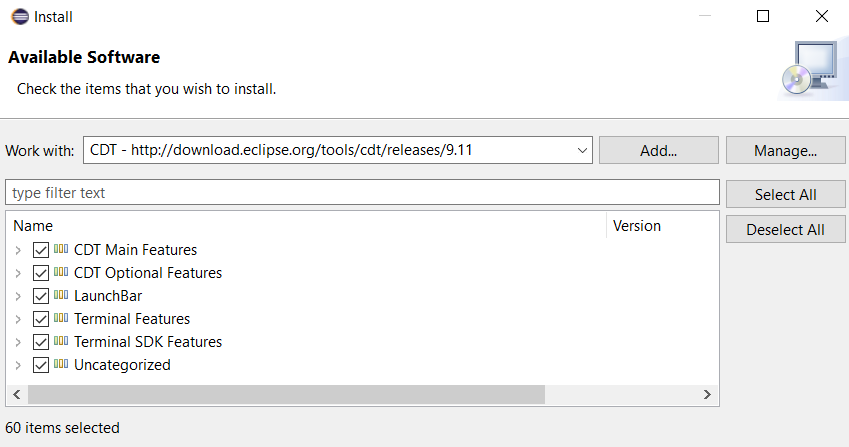
Available Software panel appears. - In Work with, select CDT - http://download-eclipse.org/tools/cdt/releases/9.11.
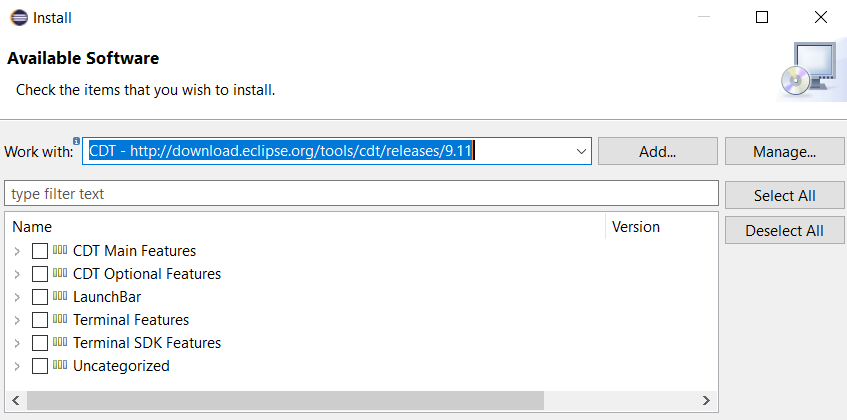
- Click Select All button.
Click Next > button.
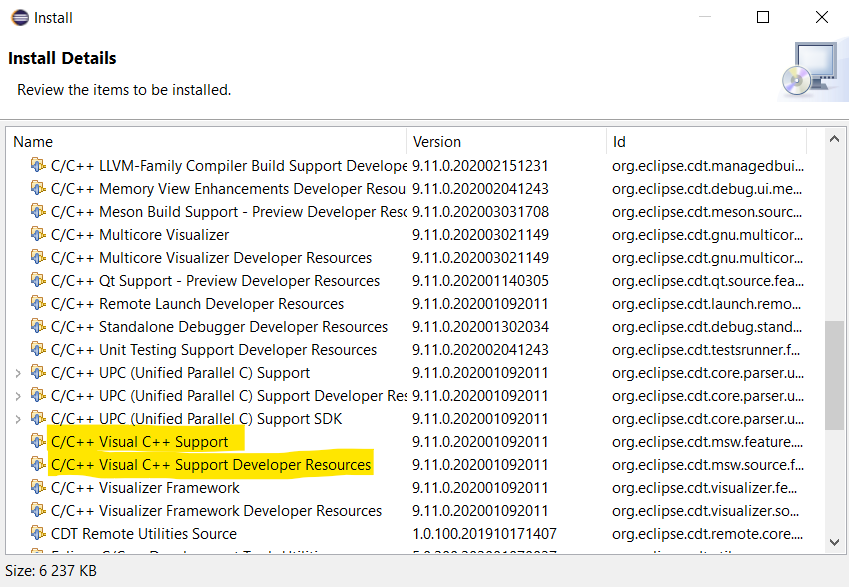
- Install Details panel appears.
Click Next > button.
- Review Licenses panel appears.
Tick the choice: I accept the terms of the license agreement.
Click Finish button. - In Eclipse IDE.
Select Help menu then About Eclipse IDE.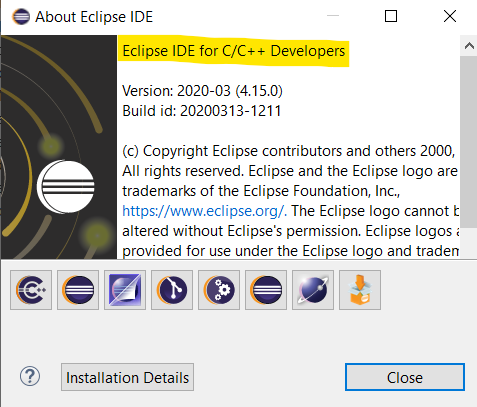
- Click Installation Details button.
C/C++ Visual C++ Support is available.
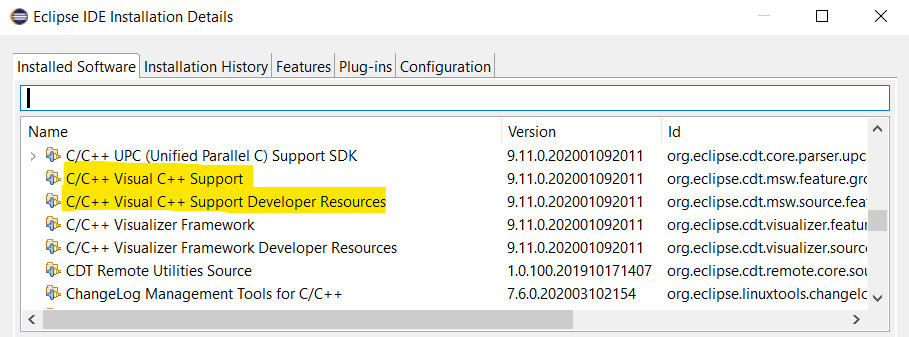
Click Close button.
C++ 32-bit HelloWorld project with Microsoft Visual C++ toolchain in Eclipse IDE
Eclipse IDE for Java developers in Windows 10 is used for this project.
- Launch Eclipse IDE for Java Developers.
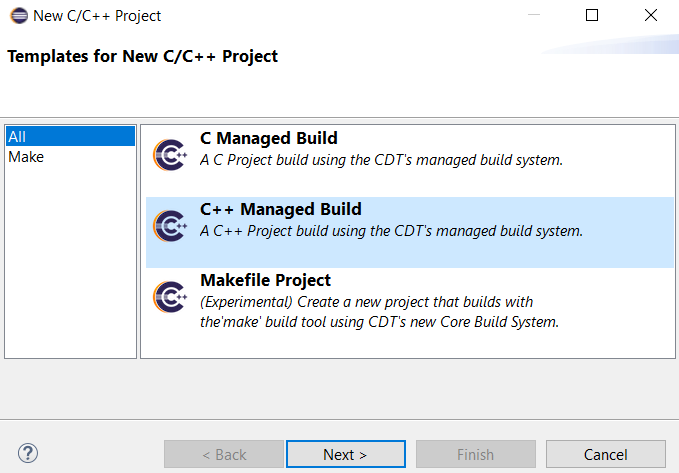
Select File menu, then New, finally C/C++ Project. - New C/C++ Project panel appears. Select C++ Managed Build.
Click Next > button.
- C++ Project panel appears.
Provide Project name: vs32HelloWorld.
Select Hello World C++ Project in Executable.
Select Microsoft Visual C++ in Toolchains.Click Finish button.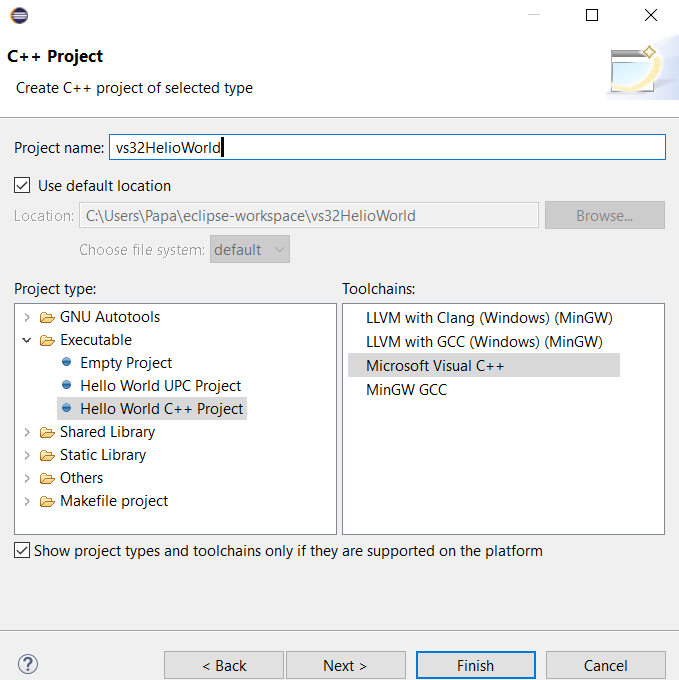
- The project folder vs32HelloWorld containing vs32HelloWorld.cpp
appears in Project Explorer of Eclipse.
#include <iostream>, std, cout, and endl are wavy underlined in red.

We must install the path of the include folder of Visual C++ 2015 for this project. This folder contains header files, whose path is:
C:\Program Files (x86)\Microsoft Visual Studio 14.0\VC\include - Right click vs32HelloWorld project in Project Explorer then select Properties.
Properties for vs32HelloWorld panel appears.
Click C/C++ Build then Settings. Click Preprocessor for C++ Compiler (cl) in Tool Settings tab.
Click + icon on the top part of Include Path (/I) area.
Provide the path C:\Program Files (x86)\Microsoft Visual Studio 14.0\VC\includeClick Apply button.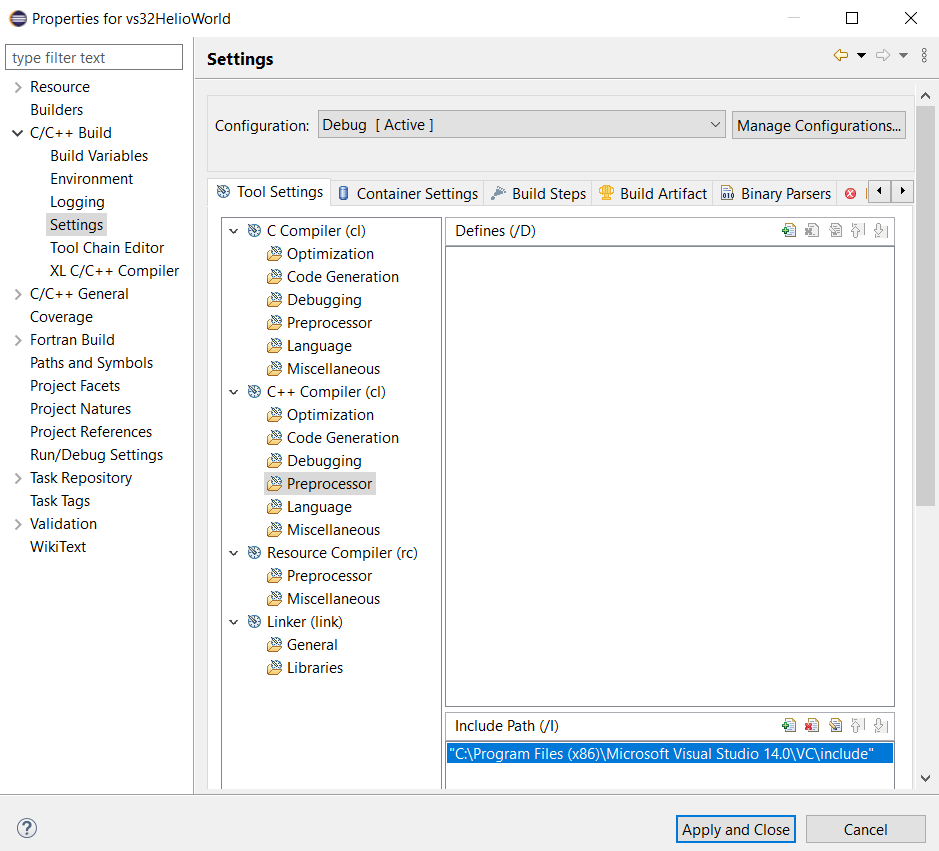
- Settings panel appears.
Click Yes button.
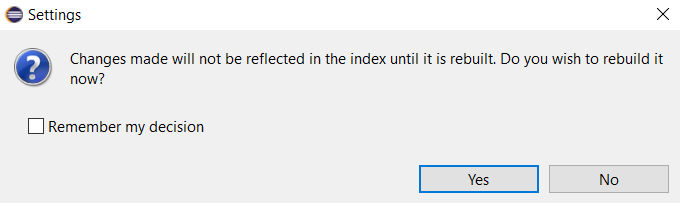
Click Apply and Close button. - Wavy underlines in the source code desappear.
A new folder called Includes is added in the project folder.
- Select Project menu than Build Project, or press the hammer icon.
Messages appear on Console tab.

Error: Program "Cl" not found in PATH ...
We must provide the path of cl.exe (the compiler of Visual Studio) to this project. It is located at:
C:\Program Files (x86)\Microsoft Visual Studio 14.0\VC\bin - Right click vs32HelloWorld project in Project Explorer then select Properties.
Properties for vs32HelloWorld panel appears.
Click C/C++ Build then Environment.
Click Add... button.
New variable dialog appears.
Provide PATH and C:\Program Files (x86)\Microsoft Visual Studio 14.0\VC\binClick OK button.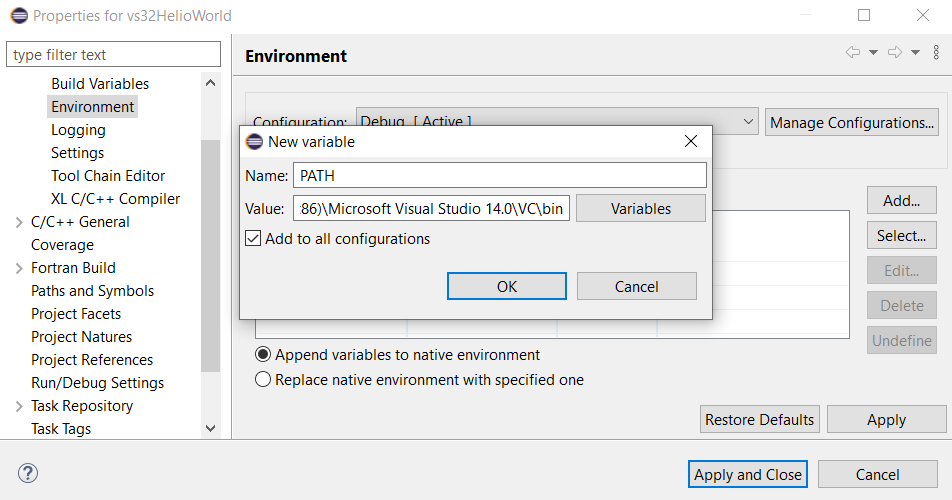
Click Apply button, then Apply and Close button.
- Select Project menu then Build Project, or press the hammer icon.
A new folder called Debug appears in the project folder.Messages appear on Console tab.
Error: file corecrt not found in PATH ...
We must provide the path of the header file, corecrt.h, to this project. It is located at:
C:\Program Files (x86)\Windows Kits\10\Include\10.0.10240.0\ucrt - Right click vs32HelloWorld project in Project Explorer then select Properties.
Properties for vs32HelloWorld panel appears.
Click C/C++ Build then Settings. Click Preprocessor for C++ Compiler (cl) in Tool Settings tab.
Click + icon on the top part of Include Path (/I) area.
Provide the path C:\Program Files (x86)\Windows Kits\10\Include\10.0.10240.0\ucrtClick Apply button, then Apply and Close button.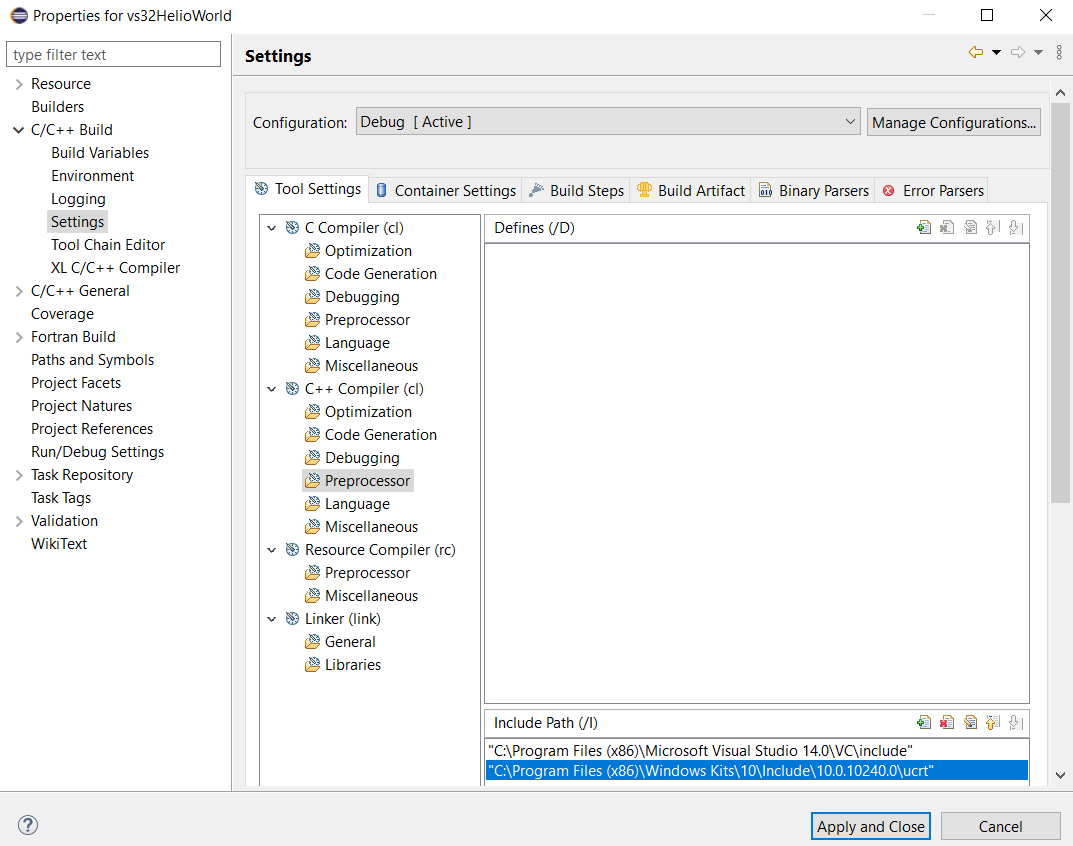
- Select Project menu then Build Project, or press the hammer icon.
A new folder appears in the Includes folder of the project folder.Messages appear on Console tab.
cannot open file msvcprt.lib
We must provide the path of msvcprt.lib to this project. It is located at:
C:\Program Files (x86)\Microsoft Visual Studio 14.0\VC\lib - Right click vs32HelloWorld project in Project Explorer then select Properties.
Properties for vs32HelloWorld panel appears.
Click C/C++ Build then Environment. Click Add... button.
New variable dialog appears
Provide LIB and the path C:\Program Files (x86)\Microsoft Visual Studio 14.0\VC\libClick OK button.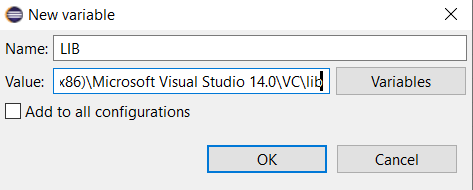
Click Apply button, then Apply and Close button. - Select Project menu then Build Project, or press the hammer icon.
A new file called vs32HelloWorld.obj - [x86/le] appears in the project folder.Messages appear on Console tab.
cannot open file 'kernel32.lib'
We must provide the path of kernel32.lib to this project. It is located at:
C:\Program Files (x86)\Windows Kits\10\Lib\10.0.17763.0\um\x86 - Right click vs32HelloWorld project in Project Explorer then select Properties.
Properties for vs32HelloWorld panel appears.
Click C/C++ Build then Environment. Click Add... button.
New variable dialog appears
Provide LIB and the path C:\Program Files (x86)\Windows Kits\10\Lib\10.0.17763.0\um\x86Click OK button.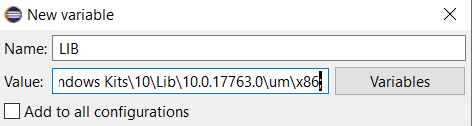
Click Apply button, then Apply and Close button. - Select Project menu then Build Project, or press the hammer icon.
Messages appear on Console tab.
cannot open file 'ucrt.lib'
We must provide the path of ucrt.lib to this project:
C:\Program Files (x86)\Windows Kits\10\Lib\10.0.17763.0\ucrt\x86 - Right click vs32HelloWorld project in Project Explorer then select Properties.
Properties for vs32HelloWorld panel appears.
Click C/C++ Build then Environment. Click Add... button.
New variable dialog appears
Provide LIB and the path C:\Program Files (x86)\Windows Kits\10\Lib\10.0.17763.0\ucrt\x86
Click OK button.
Click Apply button, then Apply and Close button. - Select Project menu then Build Project, or press the hammer icon.
A new folder called Binaries and containing 32-bit vs32HelloWorld.exe - [x86/le] is added to the projext folder.
Three files called vc140.pdb, vs32HelloWorld.lik, and vs32HelloWorld.pdb are added to the sec folder of Debug folder. - Select Run menu then Run.
Run As Panel appears.
Select Local C/C++ Application.Click OK button.
- !!!Hello World!!! appears in Console tab.

In summary, six paths are included in this 32-bit Hello World project:
-
in Setting / Preprocessor
C:\Program Files (x86)\Microsoft Visual Studio 14.0\VC\include
for cancelling wavy underlines (iostream) [1st message]
C:\Program Files (x86)\Windows Kits\10\Include\10.0.10240.0\ucrt
for corecrt.h [3rd message] -
in Environment / PATH
C:\Program Files (x86)\Microsoft Visual Studio 14.0\VC\bin
for the compiler cl.exe [2nd message] -
in Environment / LIB
C:\Program Files (x86)\Microsoft Visual Studio 14.0\VC\lib
for msvcprt.lib [4th message]
C:\Program Files (x86)\Windows Kits\10\Lib\10.0.17763.0\um\x86
for kernel32.lib [5th message]
C:\Program Files (x86)\Windows Kits\10\Lib\10.0.17763.0\ucrt\x86
for ucrt.lib [6th message]
Similarly, there are also six paths for 64-bit project:
-
in Setting / Preprocessor
C:\Program Files (x86)\Microsoft Visual Studio 14.0\VC\include
for cancelling wavy underlines (iostream) [1st message]
C:\Program Files (x86)\Windows Kits\10\Include\10.0.17763.0\ucrt
for corecrt.h [3rd message] -
in Environment / PATH
C:\Program Files (x86)\Microsoft Visual Studio 14.0\VC\bin\amd64
for the compiler cl.exe [2nd message] -
in Environment / LIB
C:\Program Files (x86)\Microsoft Visual Studio 14.0\VC\lib\amd64
for msvcprt.lib [4th message]
C:\Program Files (x86)\Windows Kits\10\Lib\10.0.17763.0\um\x64
for kernel32.lib [5th message]
C:\Program Files (x86)\Windows Kits\10\Lib\10.0.17763.0\ucrt\x64
for ucrt.lib [6th message]
Only the first path is common to 32-bit and 64-bit projects.
User environment variables in Windows 10
To reduce messages during the setup of any 64-bit project, we include the six paths in Setting / Preprocessor, Environment / PATH, and Environment / LIB for 64-bit project into user environment variables of Windows 10.
- Input env into Windows search box at the bottom of the screen.
Best result panel appears.Click Modify environment variables.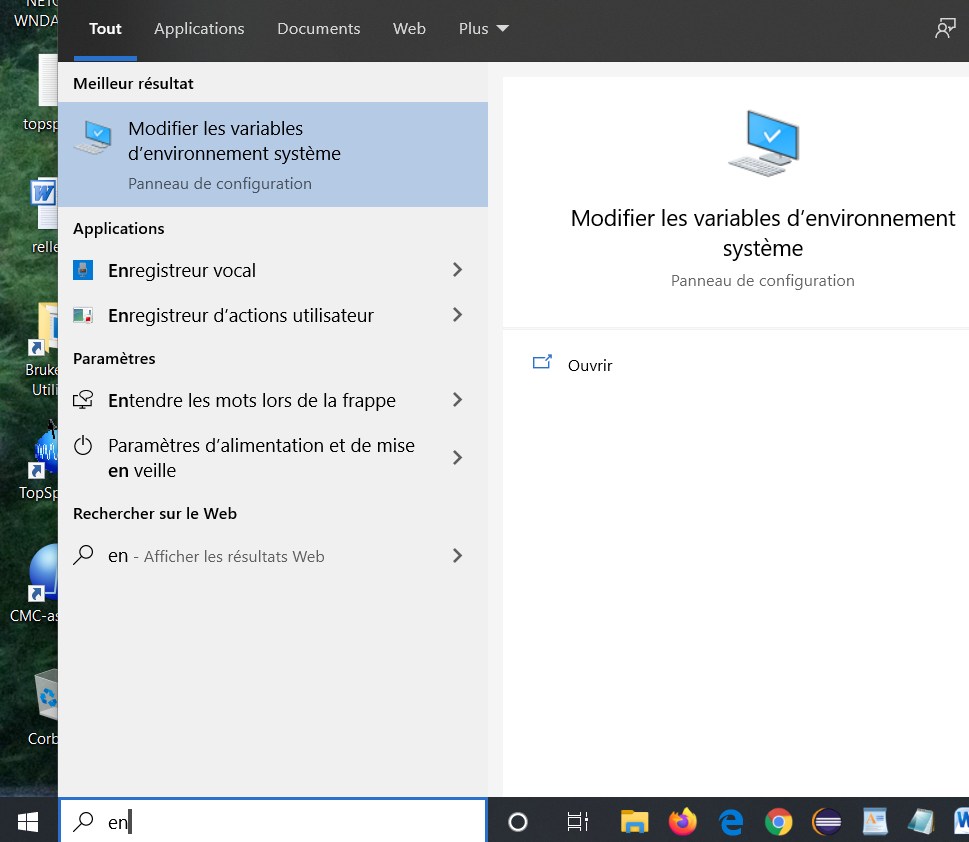
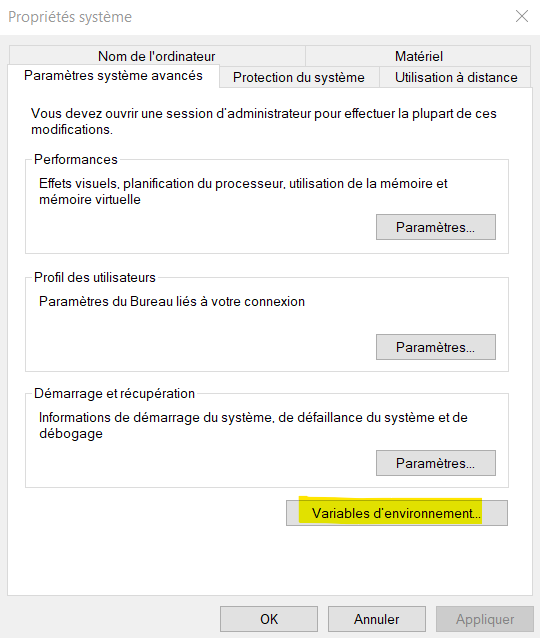
- System properties panel appears.
Click Environment variables... button.
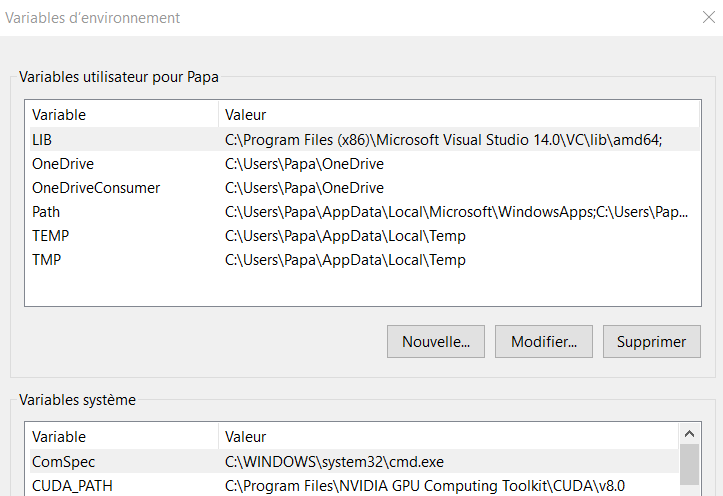
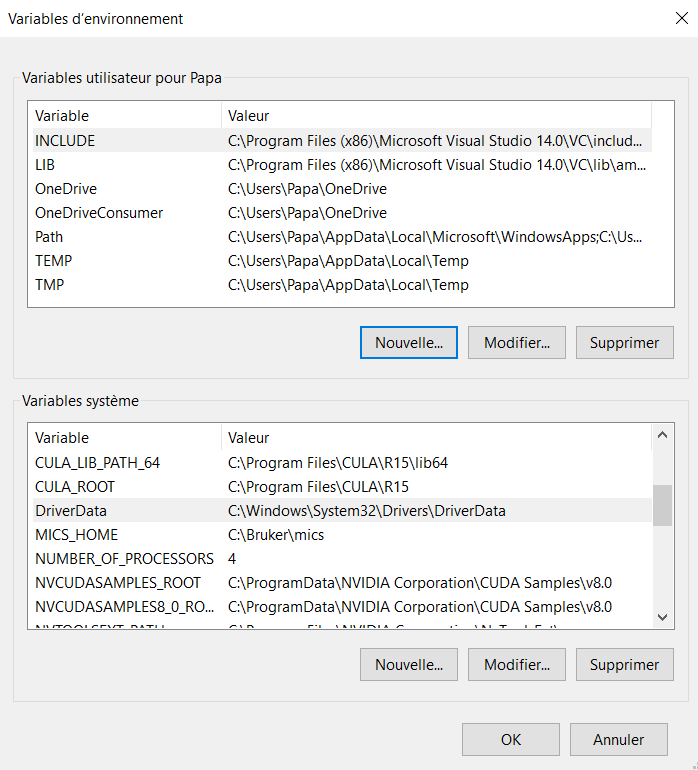
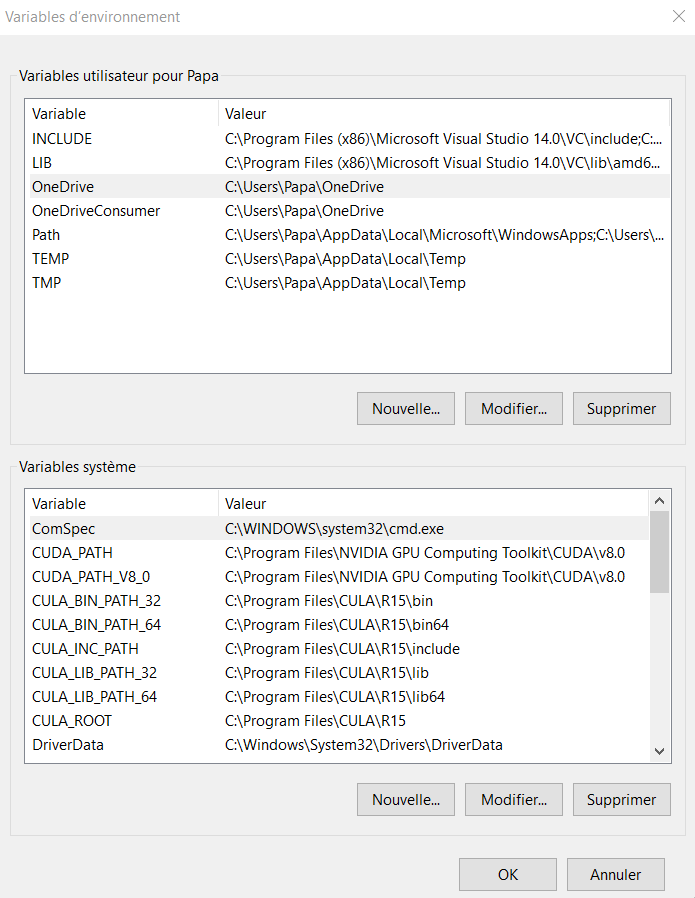
- Environment variables panel appears.
We deal with the top box concerning user variables.
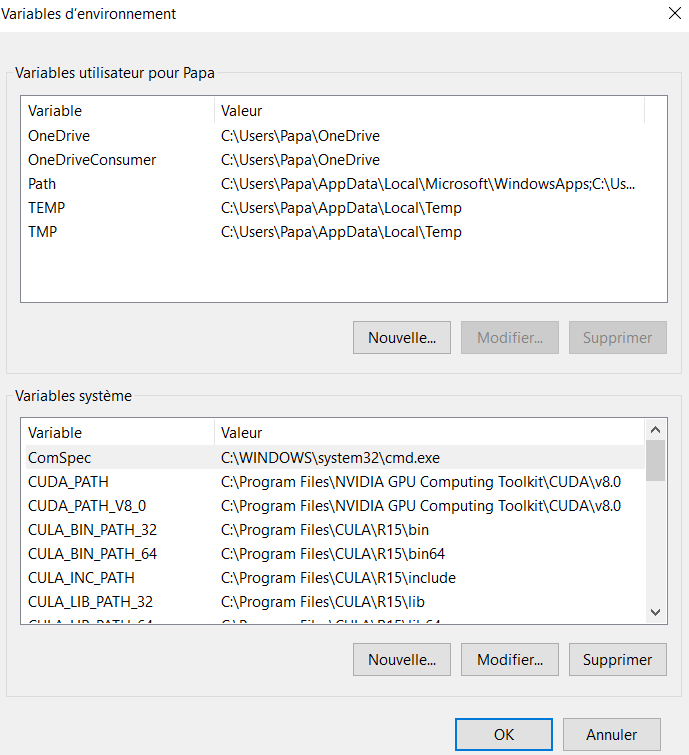
Click New... button. - New user variables panel appears.
Provide LIB for Variable name.
Provide C:\Program Files (x86)\Microsoft Visual Studio 14.0\VC\lib\amd64; for Variable value.Click OK button.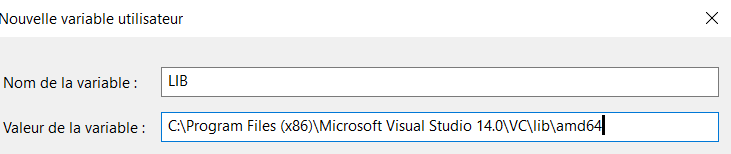
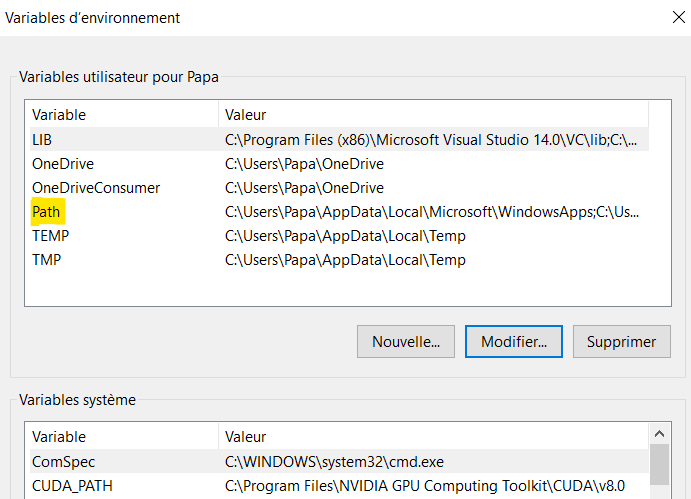
- The result appears in User variables panel.
Double click LIB.
- Modify environment variable panel appears.
Click New button.

- Provide the remaining two paths of Environment / LIB for 64-bit project:
C:\Program Files (x86)\Windows Kits\10\Lib\10.0.17763.0\um\x64
C:\Program Files (x86)\Windows Kits\10\Lib\10.0.17763.0\ucrt\x64Click OK button.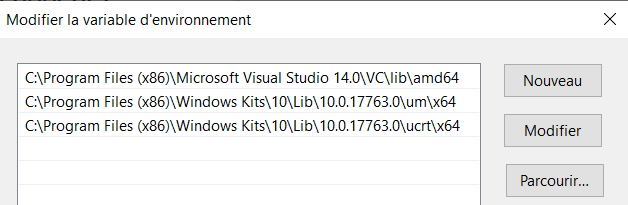
- Double click Path.
- Modify environment variable panel appears.
Click New button.
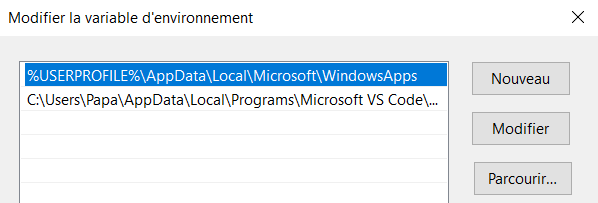
- Provide the path in Environment / Path for 64-bit project:
C:\Program Files (x86)\Microsoft Visual Studio 14.0\VC\bin\amd64Click OK button.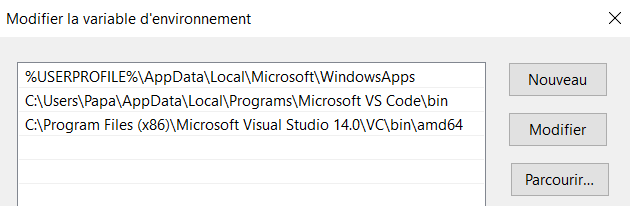
- Click New... button.
New user variables panel appears.
Provide INCLUDE for Variable name.
Provide C:\Program Files (x86)\Microsoft Visual Studio 14.0\VC\include; then C:\Program Files (x86)\Windows Kits\10\Include\10.0.10240.0\ucrt for Variable value.Click OK button.
- Click OK button twice.
Restart Eclipe IDE.
C++ 64-bit HelloWorld project with Microsoft Visual C++ toolchain in Eclipse IDE
Since the six paths are already stored in user environment variables of Windows 10, this 64-bit Helloworld project is much easier to setup than the above 32-bit Helloworld project. Eclipse IDE for Java developers in Windows 10 is used for this project.
- Launch Eclipse IDE for Java Developers.
Select File menu, then New, finally C/C++ Project. - New C/C++ Project panel appears.
Select C++ Managed Build.Click Next > button. - C++ Project panel appears.
Provide Project name: vs64HelloWorld.
Select Hello World C++ Project for Executable.
Select Microsoft Visual C++ toolchain.Click Finish button.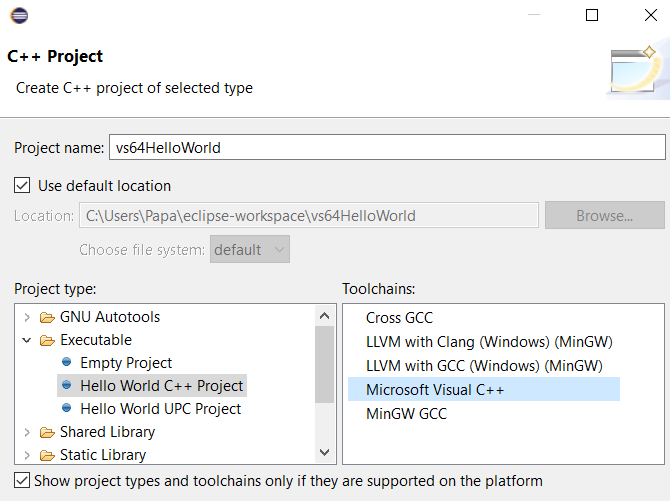
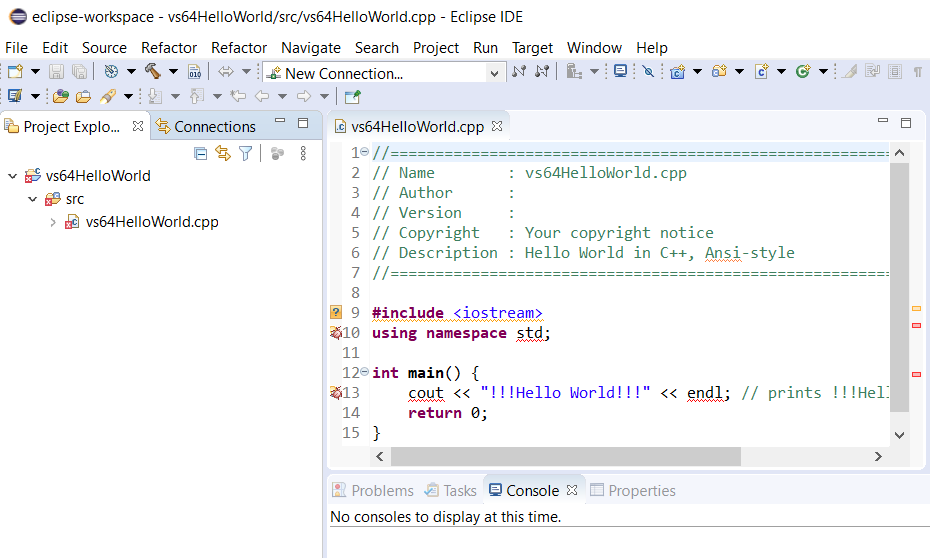
- The project folder vs64HelloWorld containing vs64HelloWorld.cpp
appears in Project Explorer.
#include <iostream>, std, cout, and endl are wavy underlined in red.
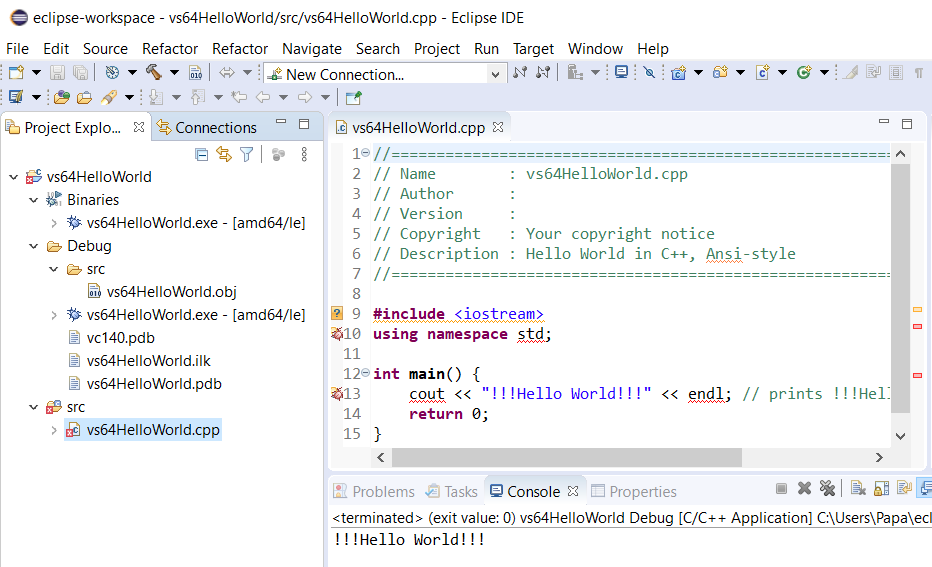
- Select Project menu then Build Project, or press the hammer icon.
Two new folders called Binaries and Debug containing vs64HelloWorld.exe - [amd64/le] are added to project folder. Three files called vc140.pdb, vs64HelloWorld.lik, and vs64HelloWorld.pdb, are added to Debug folder.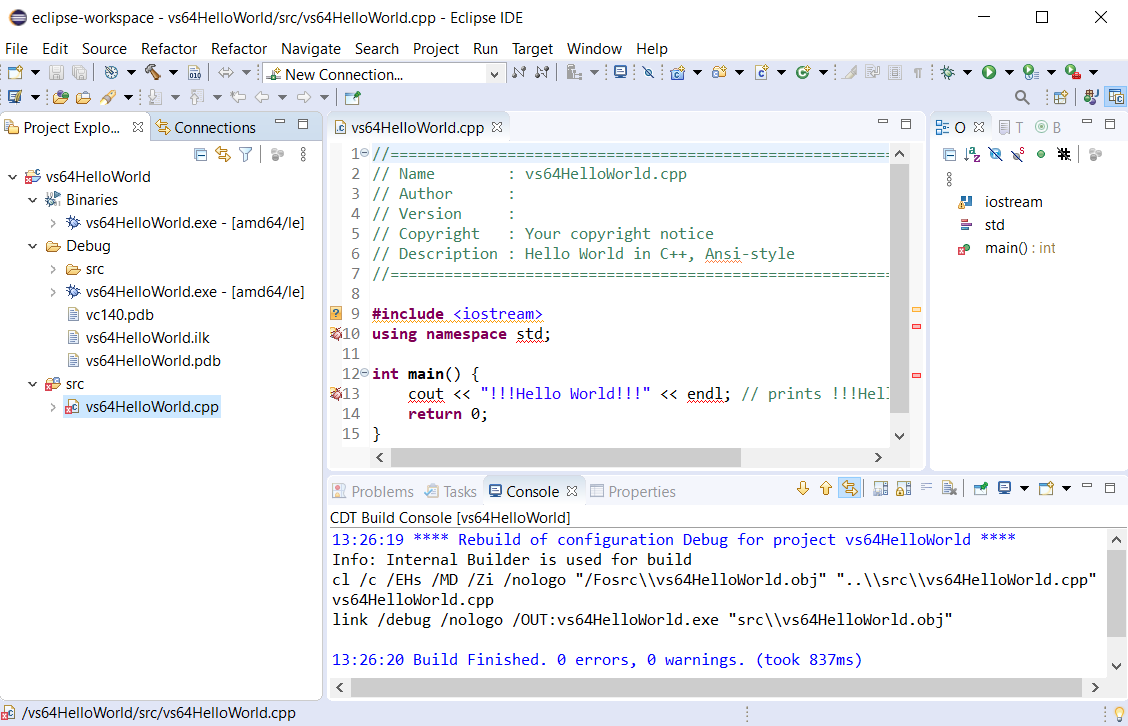
- Select Run menu then Run Configuration.
Click C/C++ Application then vs64HelloWorld Debug.Click Run button.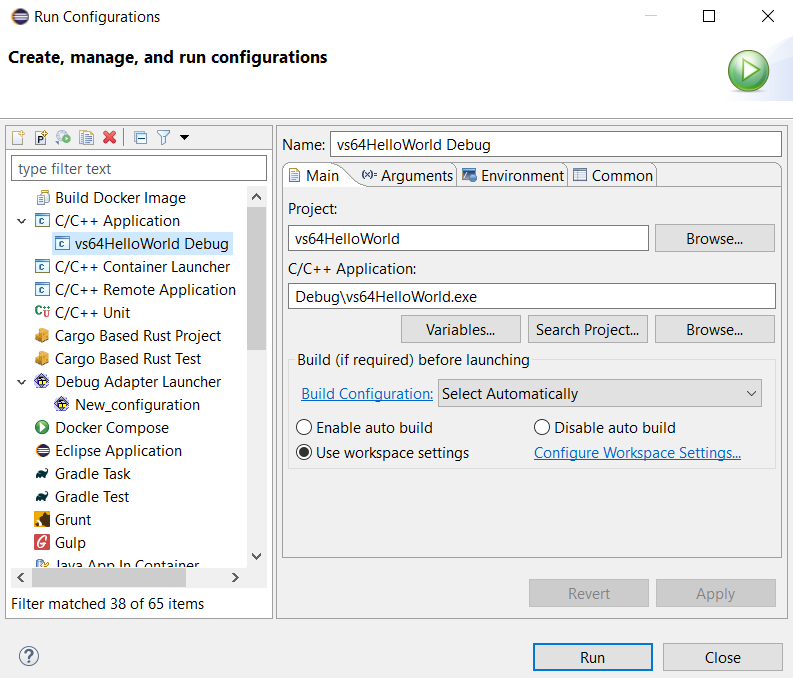
- !!!Hello World!!! appears on Console tab.
C++ 64-bit shared library svdComplexDEvice1.dll project with Microsoft Visual C++ toolchain in Eclipse IDE
Windows 10 system environment variables:
- Launch Eclipse IDE for Java Developers.
Click File menu. Select New, then C/C++ Project... - New C/C++ Project panel appears.
Select C++ Managed Build.
Click Next > button. - C++ Project panel appears.
Provide Project name: svdComplexDevice1.
Select Shared Library then Empty Project.
Select Microsoft Visual C++ in Toolchains.Click Finish button.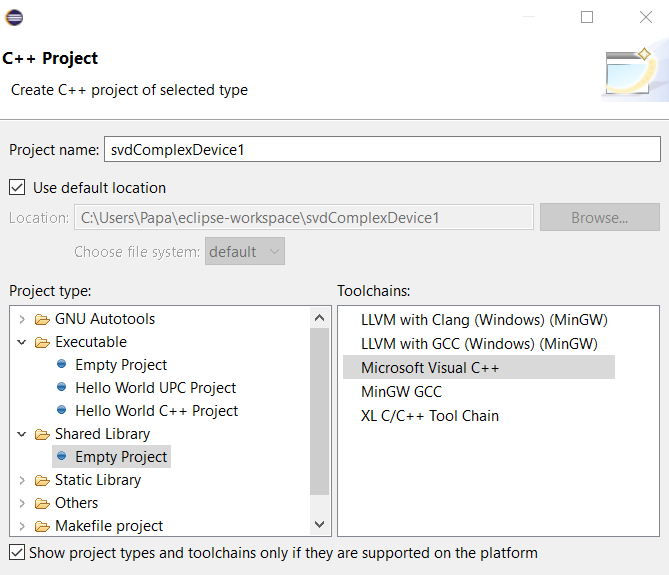
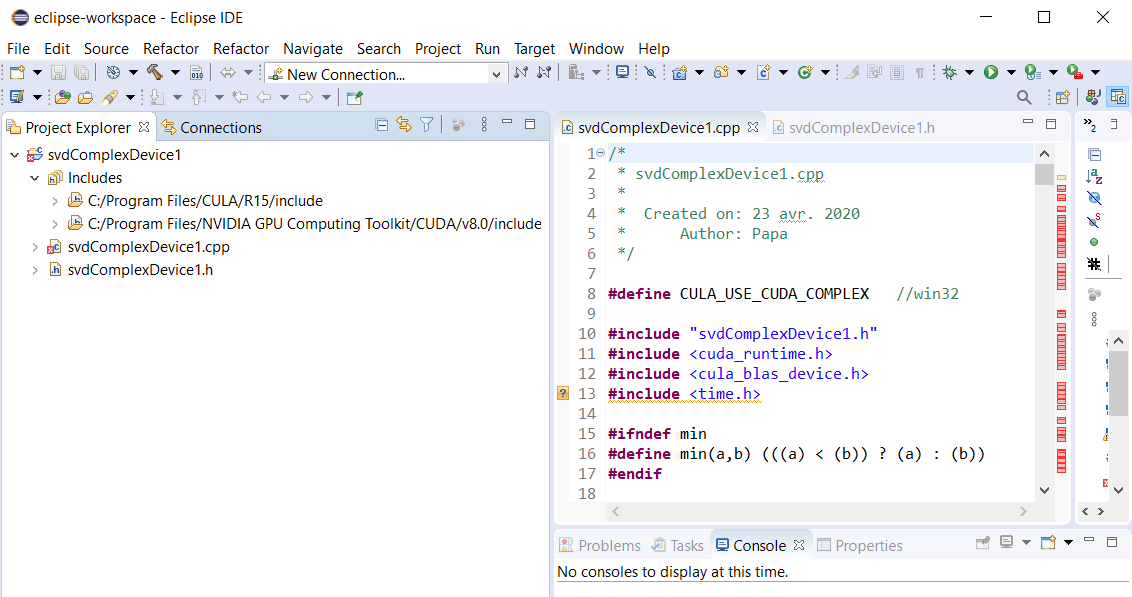
- The project folder svdComplexDevice1 appears in Project Explorer of Eclipse.
- Select File menu then New, finally Header File.
Provide the name for Header file: svdComplexDevice1.h.Click Finish button.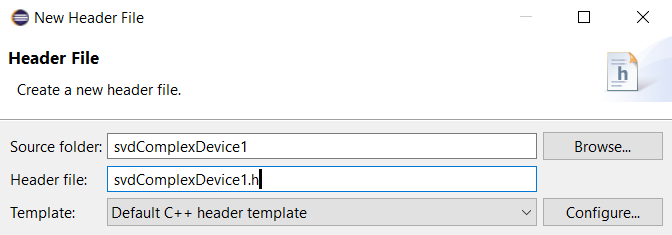
- The header svdComplexDevice1.h appears in Project Explorer of Eclipse.

- Copy and past svdComplexDevice1.h file into the newly created header file.
Press Ctrl S to save svdComplexDevice1.h.

- Select File menu then New, finally Source File.
Provide the name for Source file: svdComplexDevice1.cpp.Click Finish button.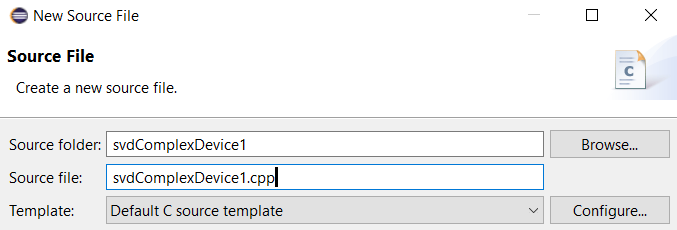
- Copy and past svdComplexDevice1.cpp file into the newly created source file.
Press Ctrl S to save svdComplexDevice1.cpp.

- With build variables you avoid using absolute paths.
Right click svdComplexDevice1 project in Explorer Project then select Properties.
Properties for svdComplexDevice1 panel appears.
Click C/C++ Build then Build Variables.Click Add... button.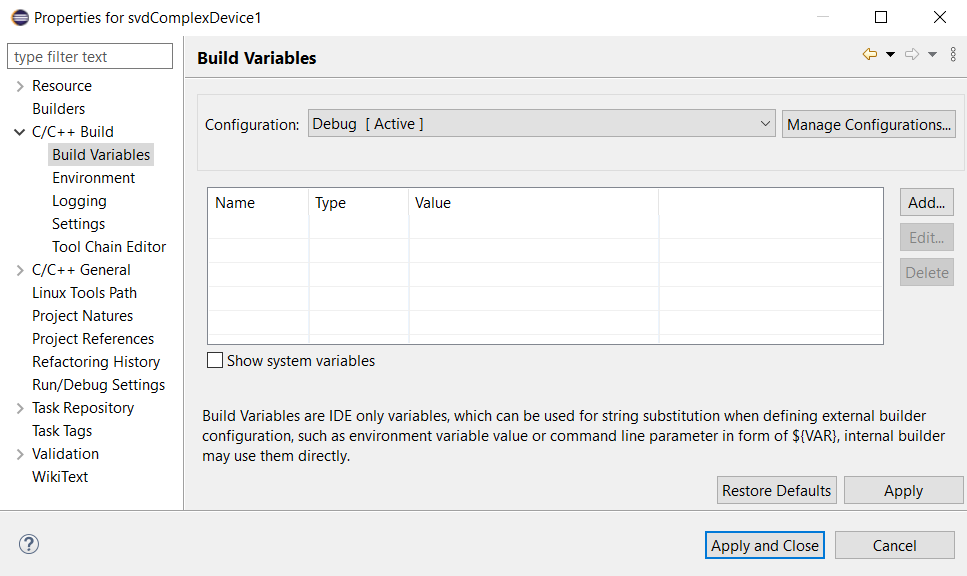
- Define a New Build Variable panel appears.
Provide Variable name: CUDA_INC_PATH
Select Path for Type.
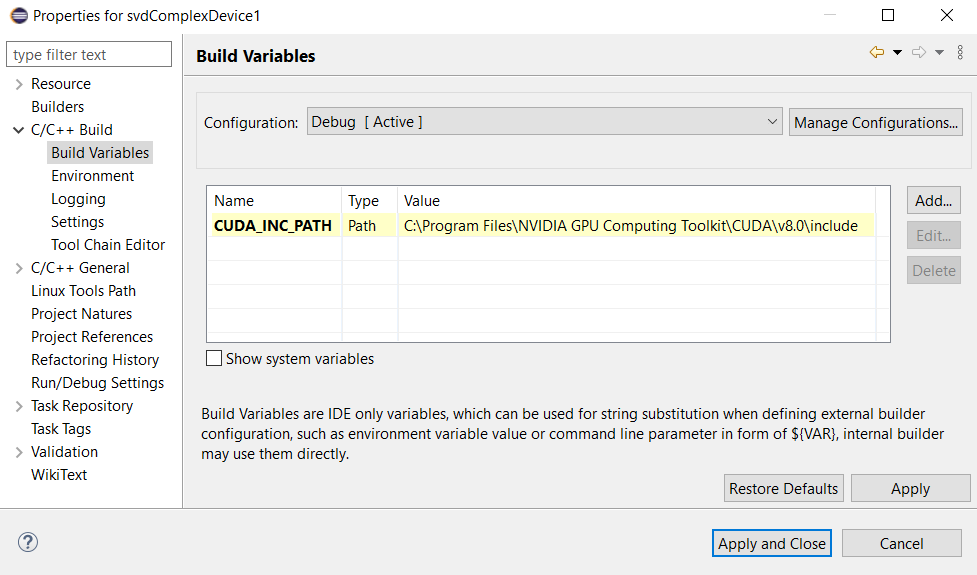
Provide Value: C:\Program Files\NVIDIA GPU Computing Toolkit\CUDA\v8.0\includeClick OK button.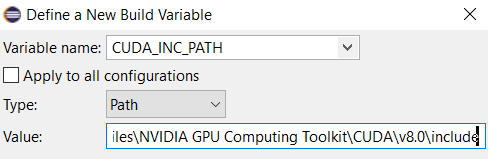
- Properties for svdComplexDevice1 appears.
- Similarly, provide three more Build Variables.
CUDA_LIB_PATH_64 and C:\Program Files\NVIDIA GPU Computing Toolkit\CUDA\v8.0\lib\x64
CULA_INC_PATH and C:\Program Files\CULA\R15\include
CULA_LIB_PATH_64 and C:\Program Files\CULA\R15\lib64
CULA_INC_PATH and CULA_LIB_PATH_64 are already defined in Windows 10 system variables.Click Apply button.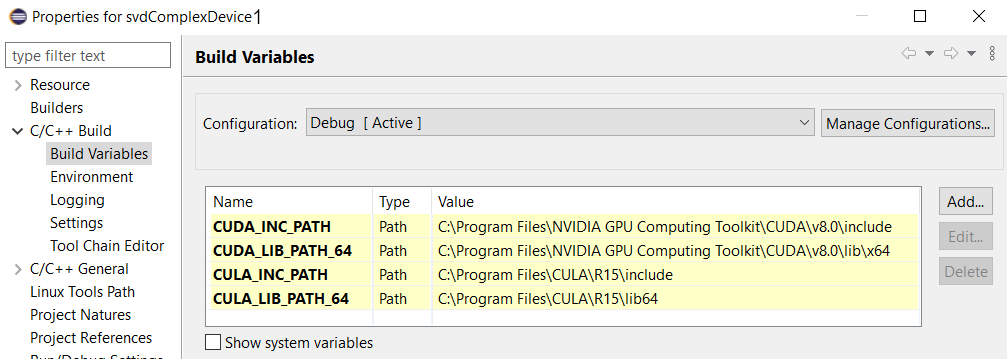
- Provide the path of include folder of CUDA and that of CULA to compiler.
Include folder contains header files.
Click Settings in C/C++ Build.
Click Preprocessor for C++ Compiler in Tool Settings tab.Click + symbol in top part of Include Path (/I).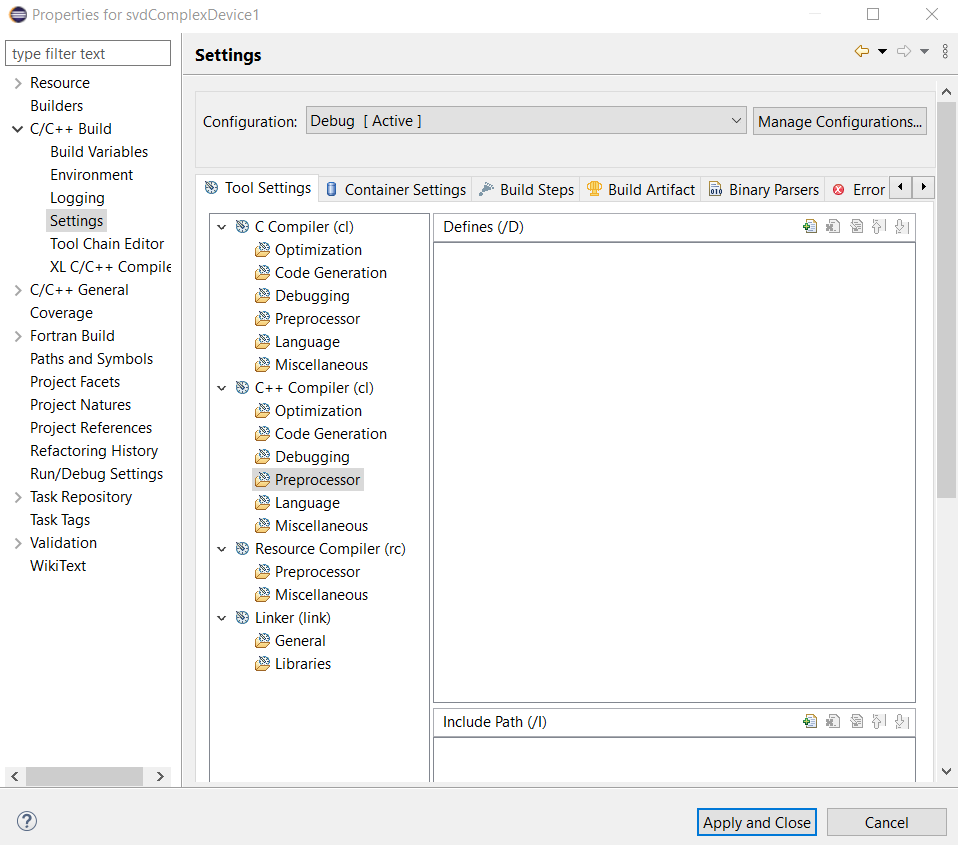
- Add directoriy path panel appears.
Provide "${CUDA_INC_PATH}" for Directory.
Directory must be enclosed in double quotes because this path contains space characters.Click OK button.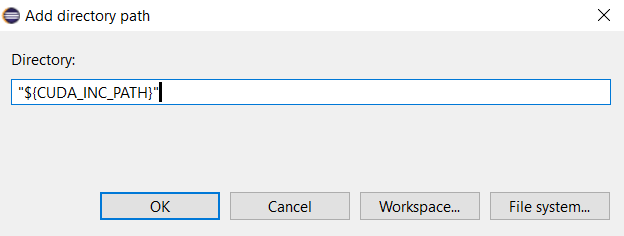
- Similarly, provide the path "${CULA_INC_PATH}"
Click Apply button.

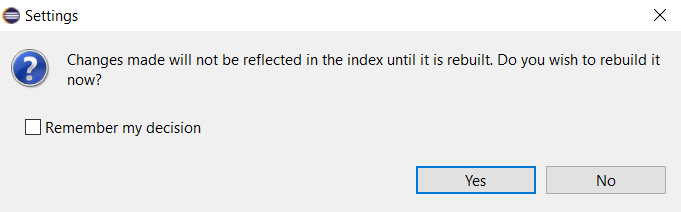
- A message apears.
Click Yes button.
- Provide four libraries (cula_core.lib, cublas.lib,
cudart.lib, and cula_lapack.lib)
and their folder location ("${CUDA_LIB_PATH_64}" and "${CULA_LIB_PATH_64}")
to the linker.
Click Libraries for Linker (link) in Tool Settings tab.
Library file names are provided with extension .lib like in MS Visual Studio and paths are enclosed in double quotes.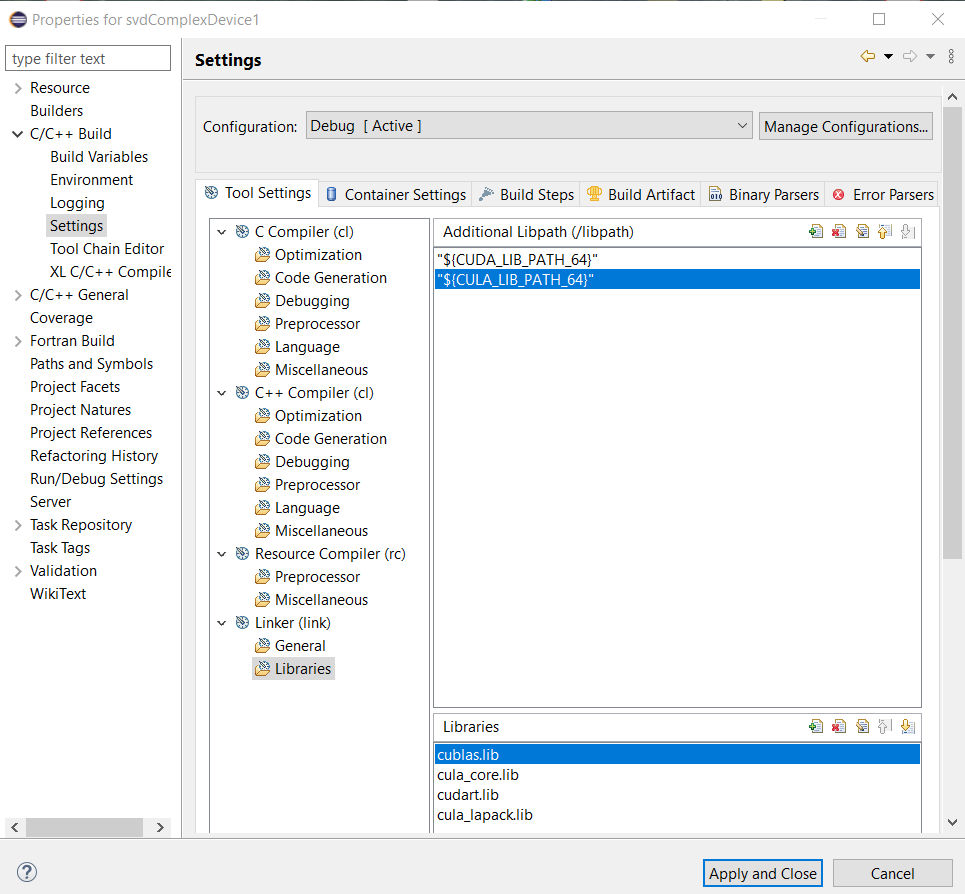
Click Apply button.
A message appears.
Click Yes button.
Click Apply and Close button.
- The project before Build.
- Select Project menu then Build Project, or press the hammer icon.
64-bit svdComplexDevice1.dll file is generated in Binaries and Debug folders.
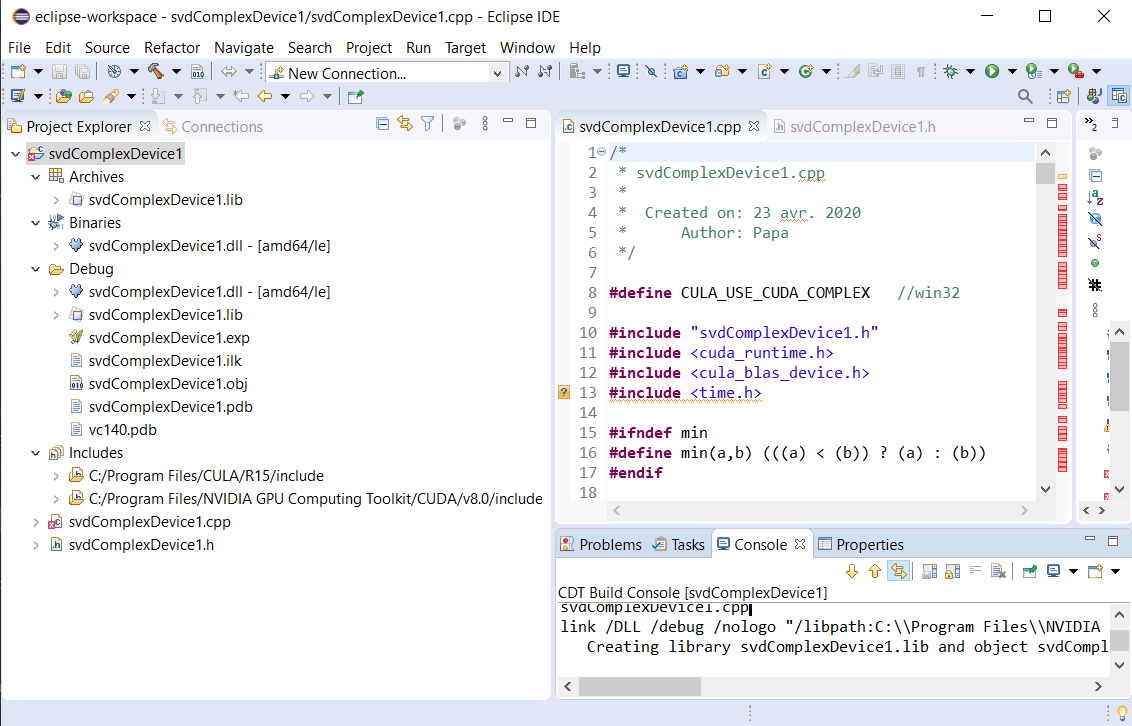
A message appears on the CDT Build Console.
Various references
- Dan Dar3: Eclipse CDT and Microsoft Visual C++ compiler
- Eclipse Foundation: CDT downloads
- StackOverflow: Visual Studio toolchain in Eclipse for C++
- Microsoft: Visual C++ installed, but cannot find cl.exe?
- StackOverflow: Visual Studio 2015 doesn't have cl.exe
- StackOverflow: Cannot find corecrt.h
- StackOverflow: Cannot open file 'kernel32.lib'
- StackOverflow: Cannot open file 'ucrt.lib'
- StackOverflow: cannot open file 'MSVCRTD.lib'